How to Generate 3D Models with AI (Donatellio + Unity/Blender)
7/30/2025
Goal: ship game-ready assets fast without losing creative control.
At a Glance
- Flexible pipeline: tweak prompts and styles at each stage
- Modular generation: create separate parts and assemble in Unity, Blender, or other DCCs
- In-engine iteration: free Unity plugin for generating & editing models inside the Editor
- Animation-ready: export FBX → Mixamo for humanoids; use auto-rig + Blender for complex rigs
- Texture handoff: quickly reapply original textures in Unity/Blender if a rigging tool ignores them
- Performance-aware: pick polycounts that match your platform and asset role
Step-by-Step: AI 3D Workflow
1. Outline style and usage
Decide on style (realistic, stylized, low poly, etc).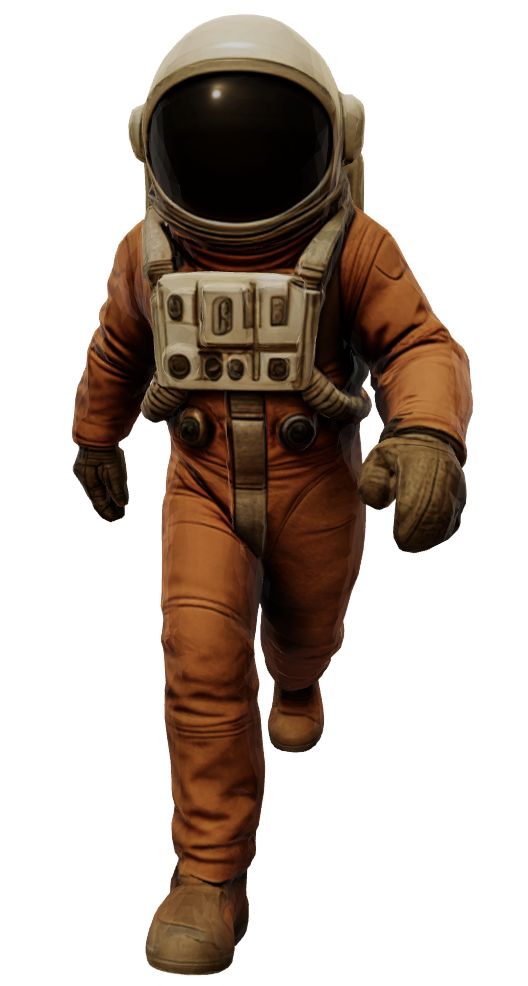
 How will the asset be used? Is it a hero asset, foreground asset, or background asset?
Does this asset need to be animated? Is it a humanoid, animal, or object?
2. Map out separate components
For larger assets, you likely need to generate separate parts, especially if these parts are movable or animated. With Donatellio, this can be done by generating a single image, then removing/isolating each element in a new image to generate a mesh off this. In the example of a car, it is often better to generate wheels, doors, and the chassis separately if the asset needs to have the car roll on its wheels and the door open.3. Upload/Generate Image
Once you have the rough outline of how each asset should look and be broken down into components, you can generate the whole asset, make edits until it looks right, and then break it down into components if needed. You can experiment with different styles and different prompts until you have the images you want to generate. By clicking the images and pressing 'Continue', you will generate that mesh.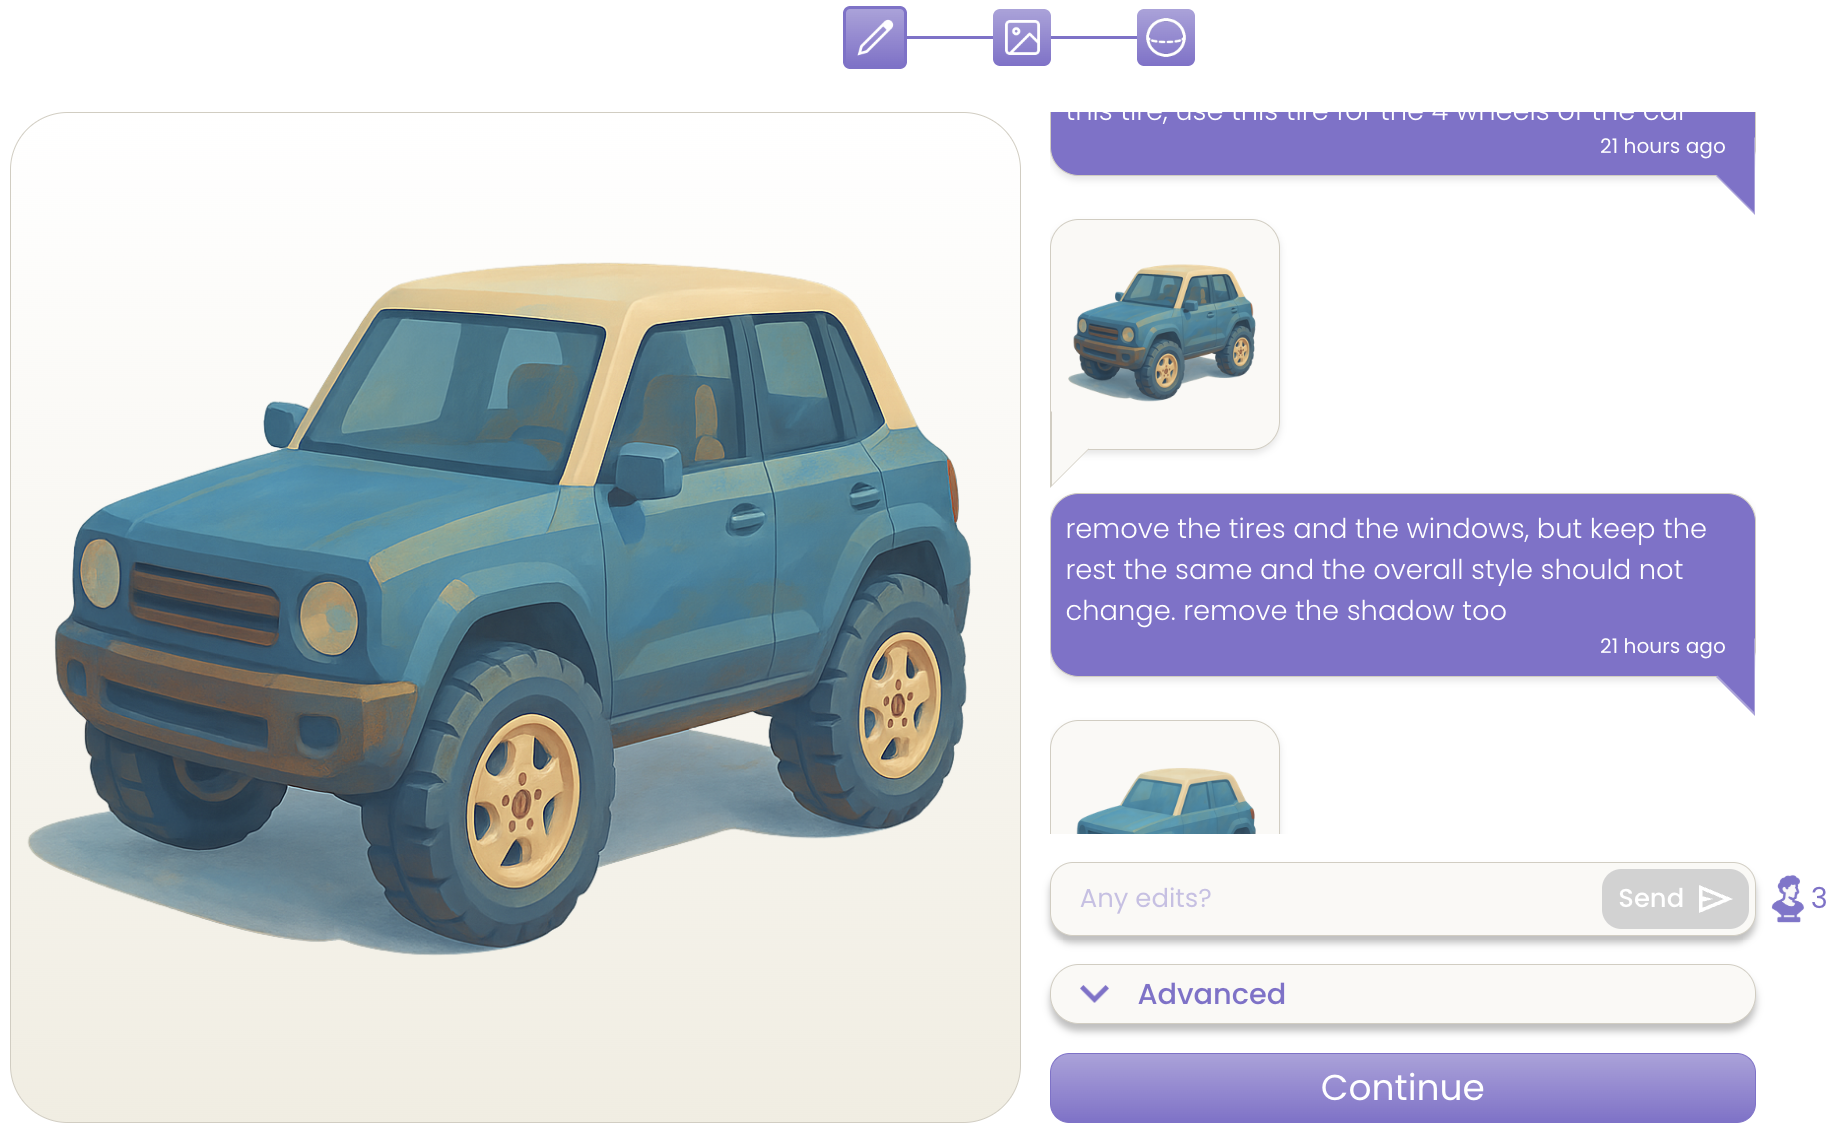
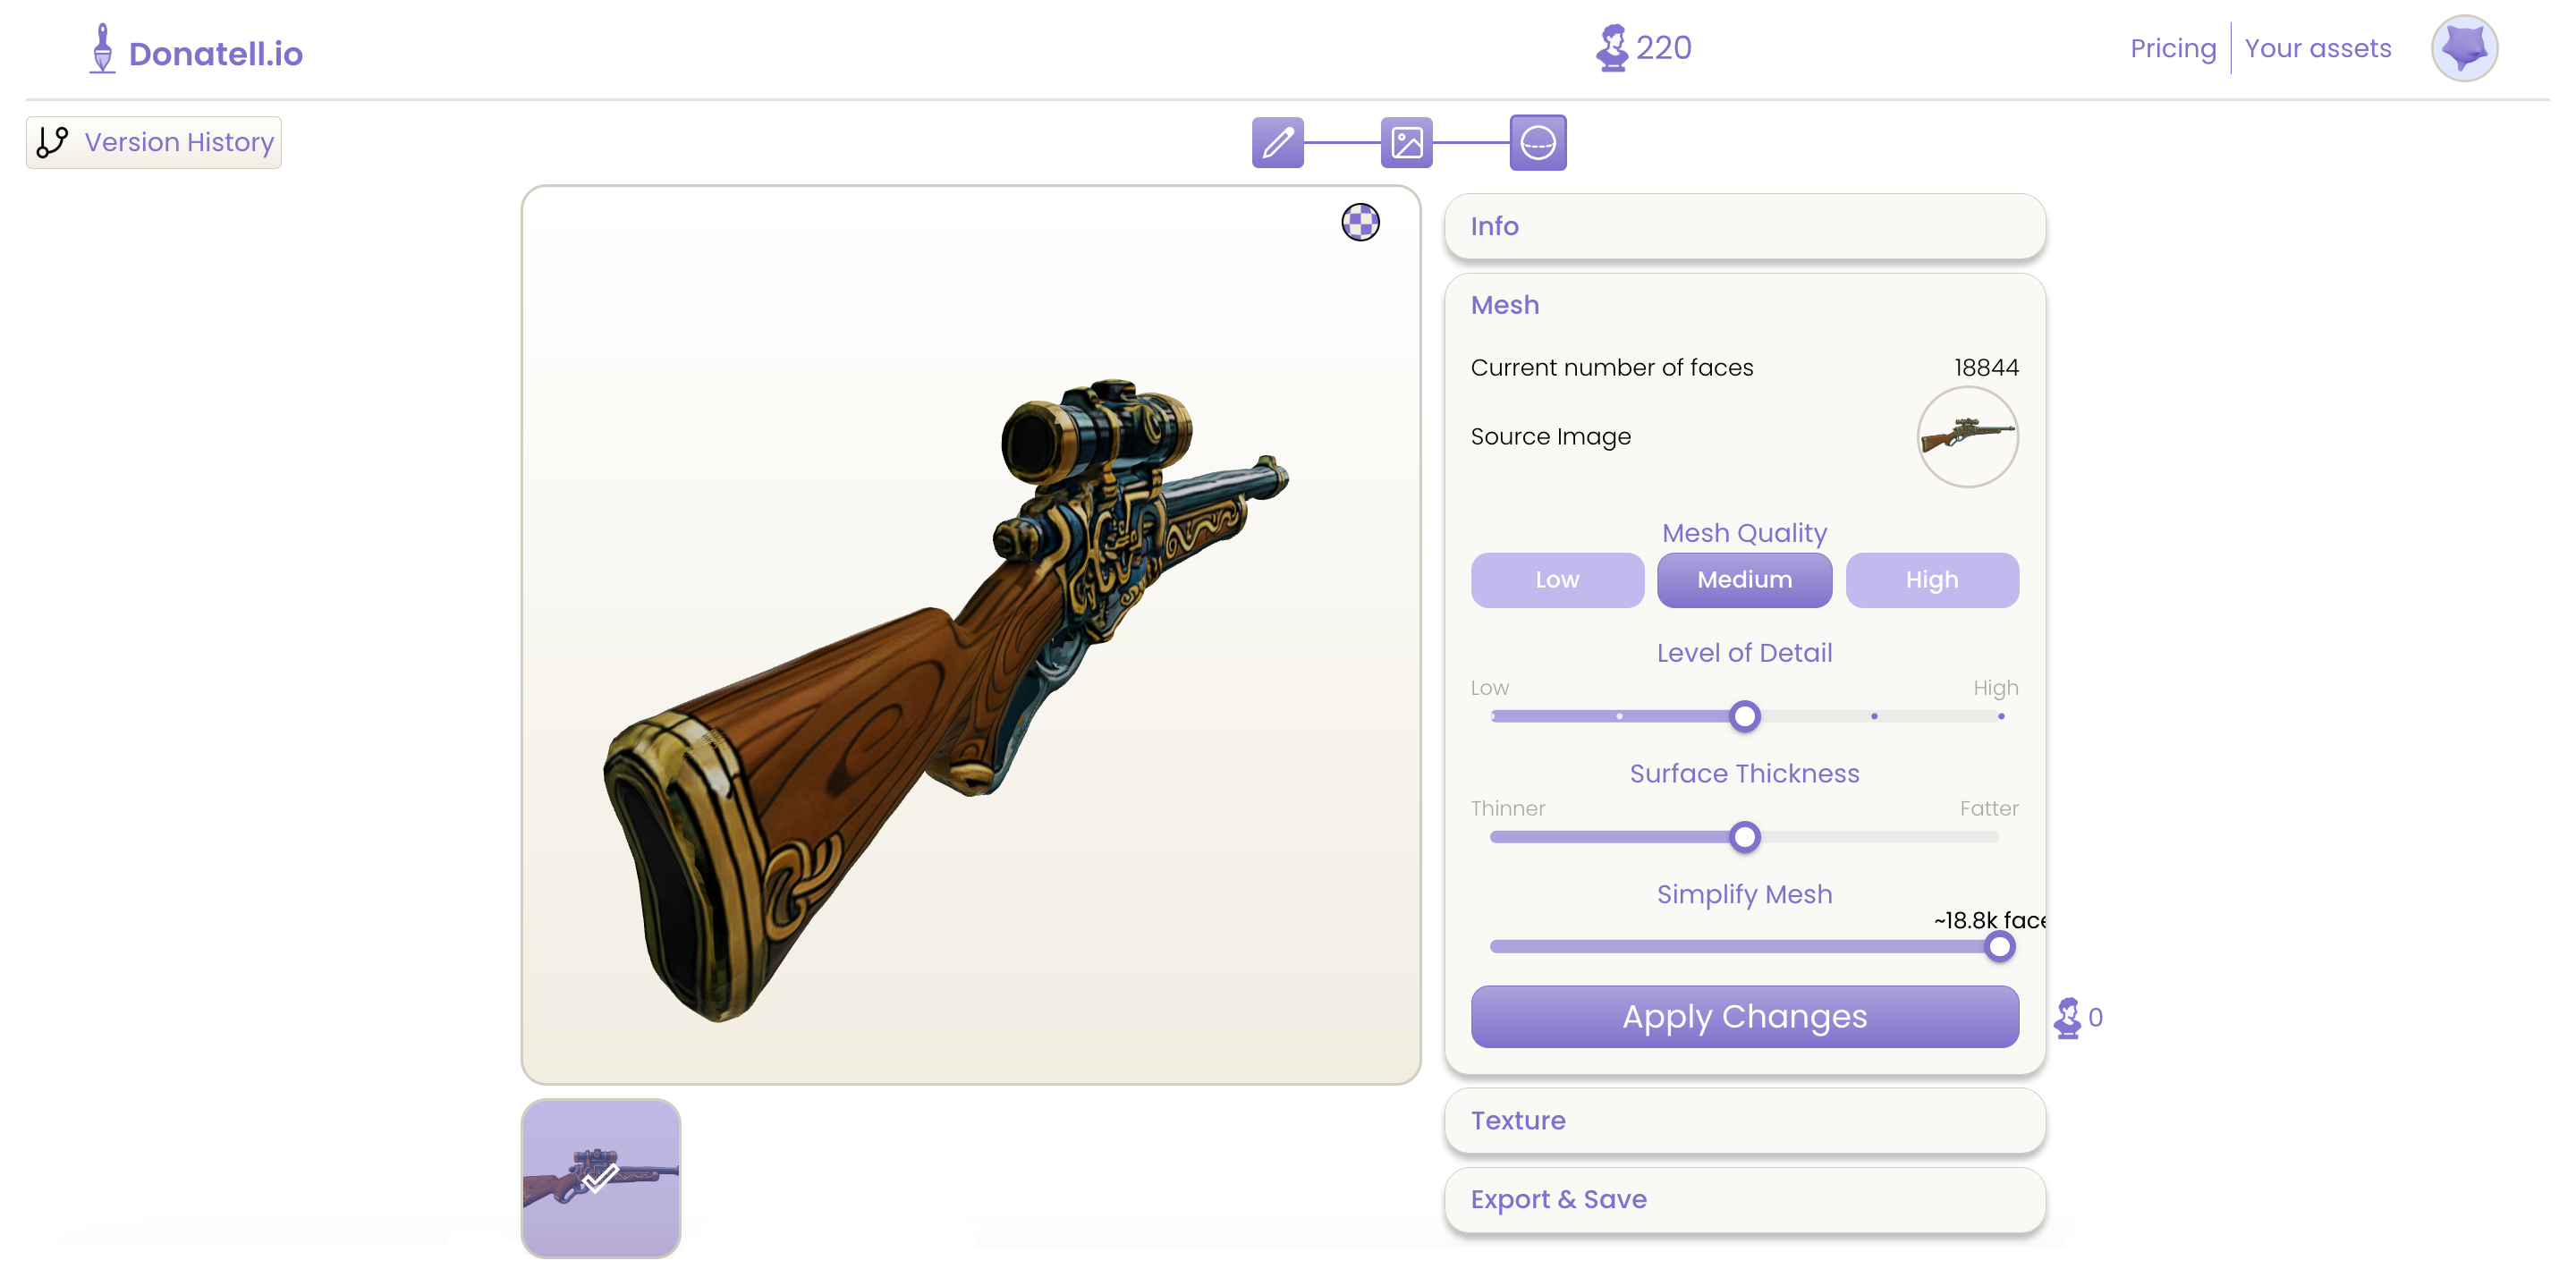
4. Generate Mesh
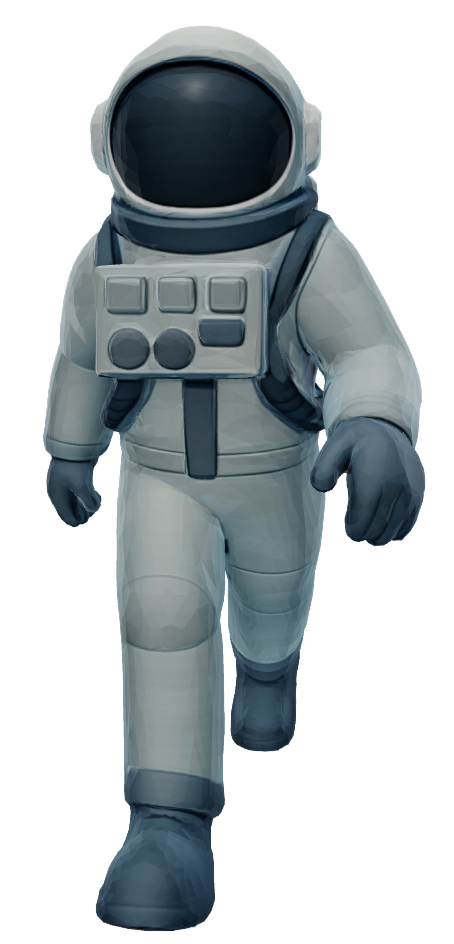
Now, generate the meshes by setting the mesh quality & number of initial meshes to generate. It is often better to generate 2-4 meshes as our 3D diffusion model may interpret a 2D image in multiple 3D interpretations, but you can always go back to this step to generate more meshes. If you only input the front face of an asset, the back and side profiles will need to be generated, leading to multiple possibilities.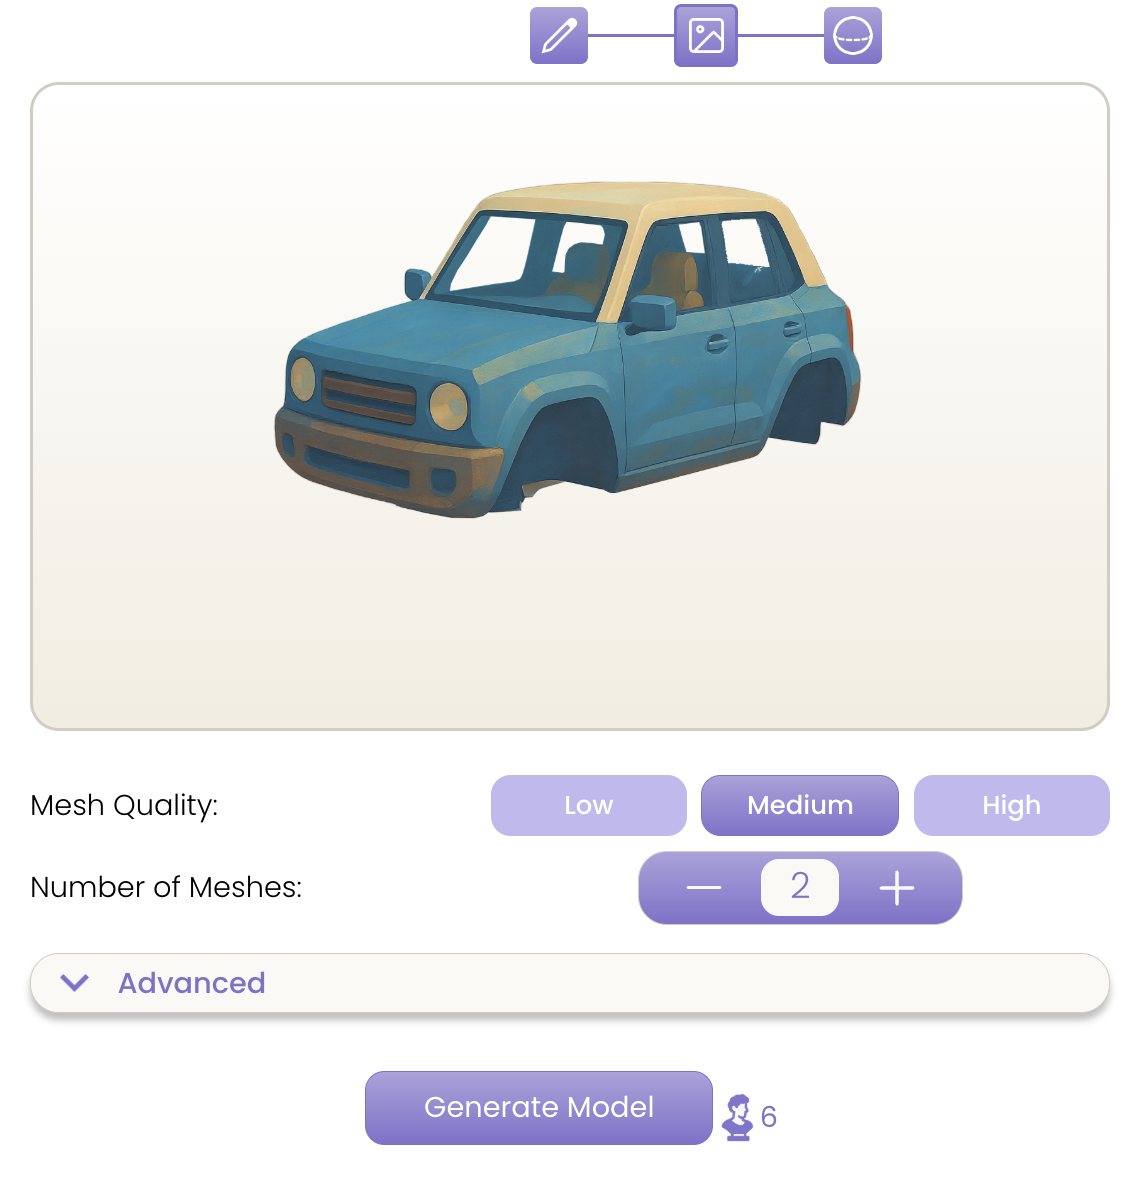
5. Iterate on Mesh
In editing the generated mesh, you can tweak the surface thickness of the mesh, level of detail, and overall polygon/face count.The best model is the one that preserves its silhouette with the lowest poly count. Use the table as a starting point; real targets depend on style, platform, and role.| Asset role | Typical polygon range |
|---|---|
| Hero assets (characters, centerpiece props) | 10k-350k depending on art style, platform, and required detail |
| Foreground assets (near-camera props: weapons, doors, terminals, vehicles) | 2k-20k polys mobile 3k-8k PC/console 8k-20k |
| Background assets (chairs, small props, non-interactive set dressing) | 100-5k depending on style, platform, and desired detail Mobile 100-500 PC/console 500-2k |
Notes:
- For mobile, go towards the lower end of the ranges.
- For high-end PC/console, you can spend more on heroes, but be sure to profile and use LODs.
- Always validate with on-device performance (frame time, memory).
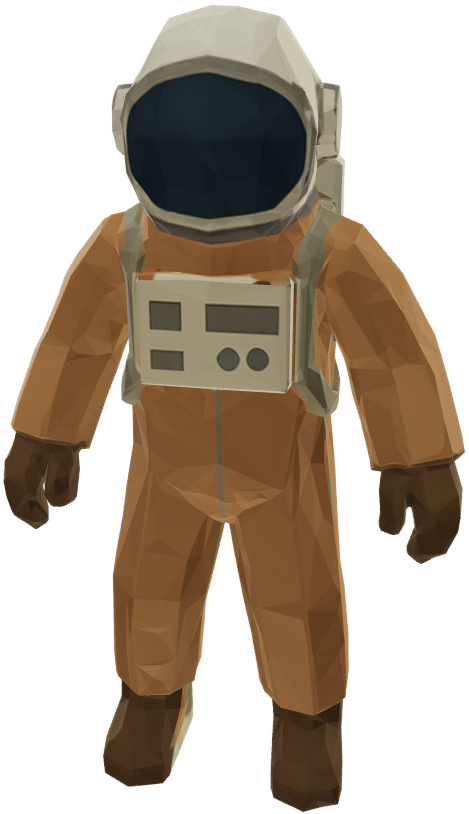
6. Generate Texture
For the majority of cases, picking the default Normal settings and no additional prompt will work fine. If the texture is very complex, set quality to 'Precise'. You can use the additional prompt to specify materials or other additional info you believe is needed to generate an accurate texture. You can always regenerate the texture until you are satisfied with the results.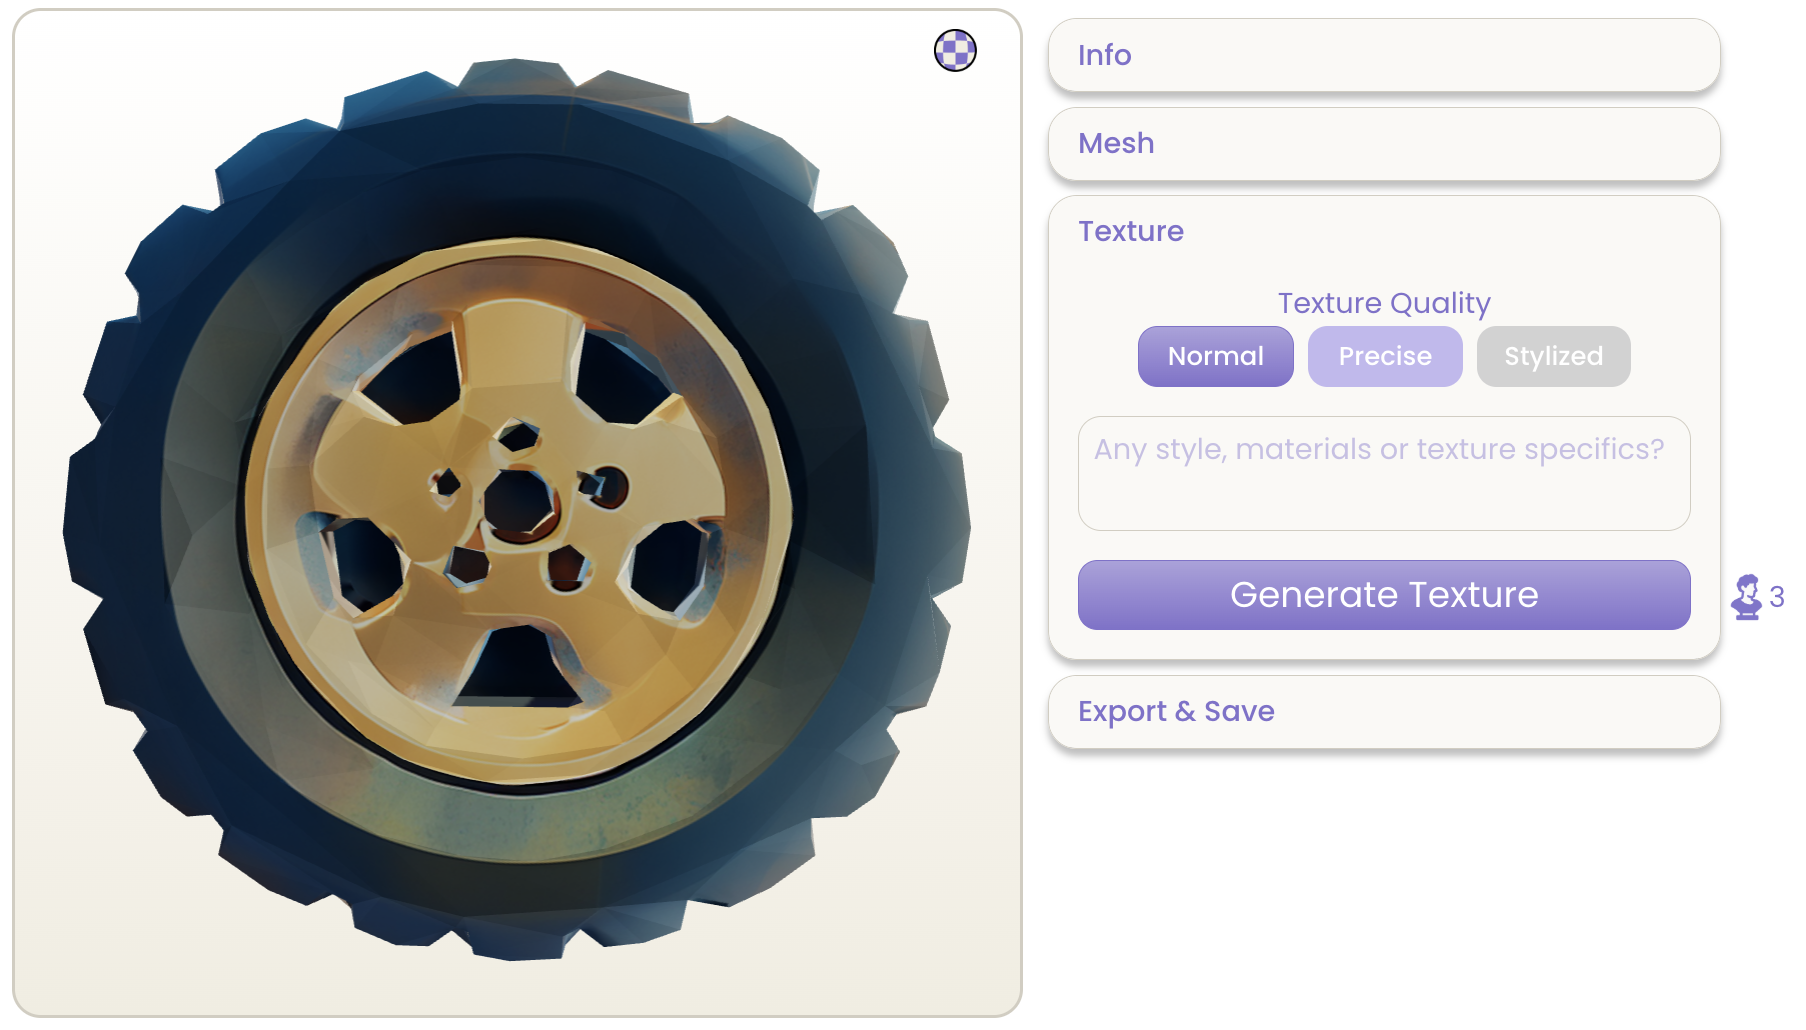
Remember, you can always go back to generating/editing meshes if the textured meshes do not turn out well.
7. Export
If you wish to use Mixamo or some other rigging software (i.e., ActorCore AutoRig), .fbx files are the most widely supported. For easy imports in Unity, Unreal, and Godot, .glb files work very well. If you wish to make manual edits to the mesh with Blender, you can export it as a .blend file.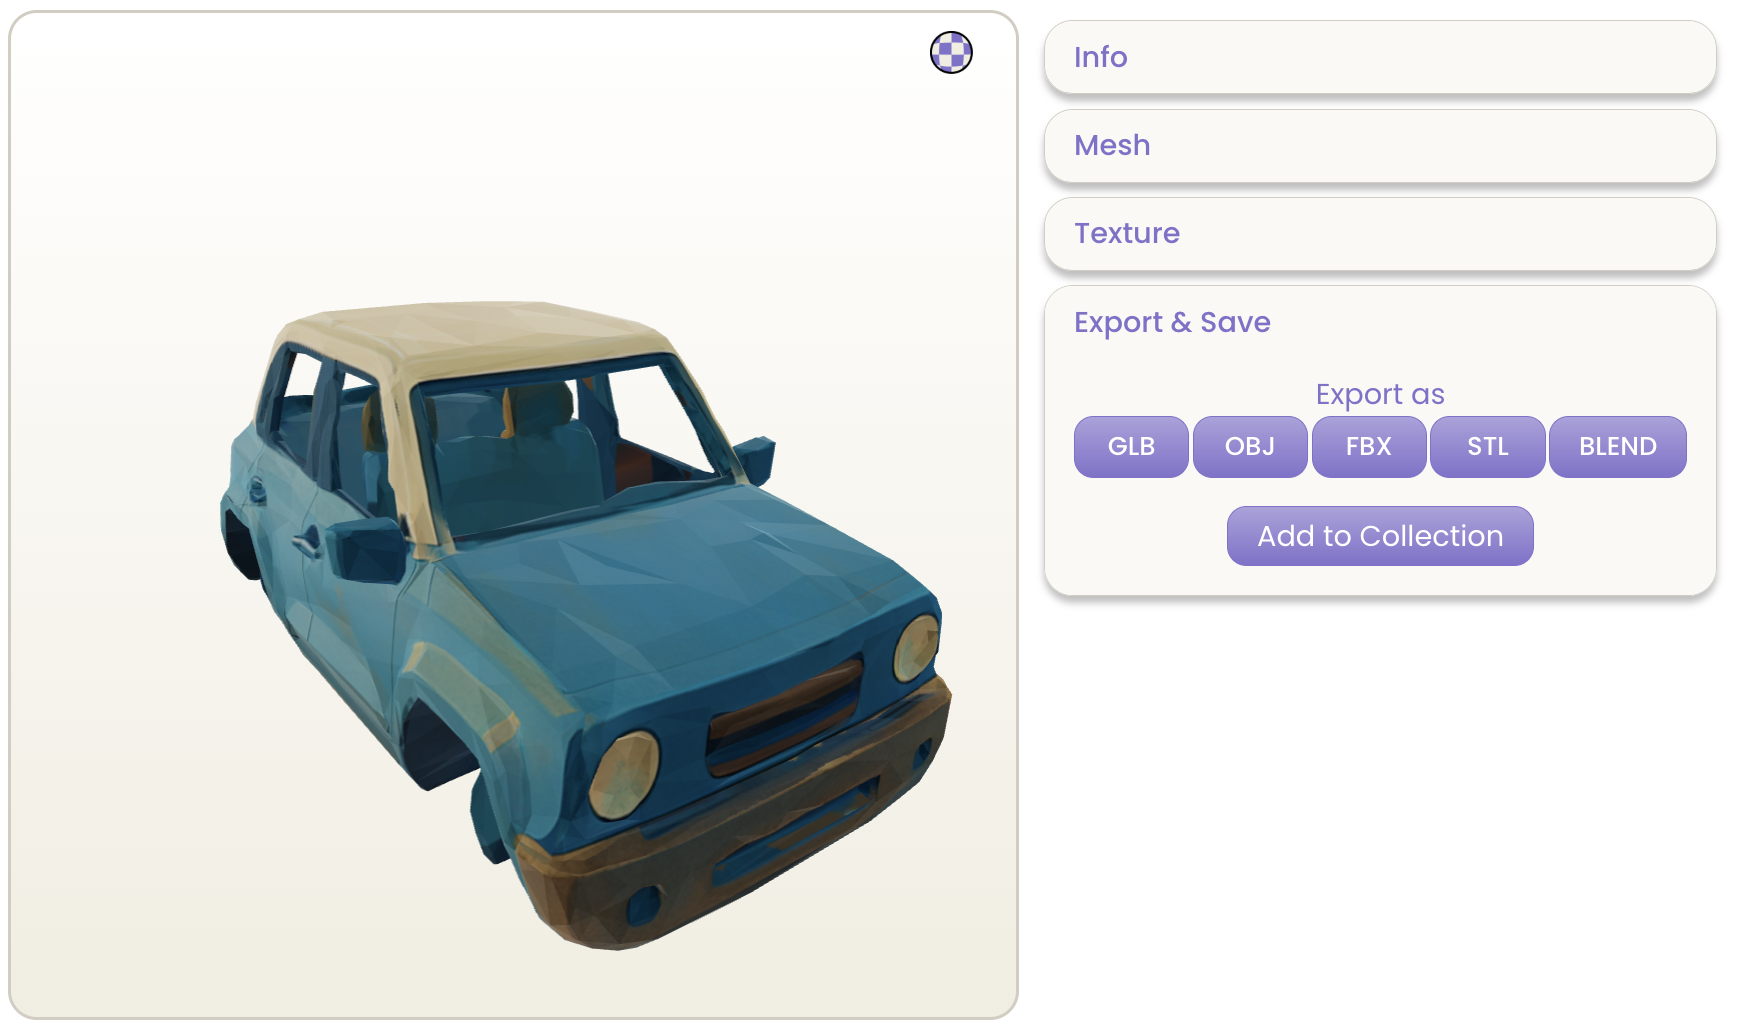 You can download as many formats as you want, there is no limit/credit usage in downloading your creation.
Tips for the future
- Create an account for free at donatell.io to get started.
- Check out our Unity Plugin to generate and texture meshes all from within Unity. Other plugins are coming soon!
Stay Connected
© 2025 Donatellio. All rights reserved.